Google Workspace Allow Listing
This guide explains how to configure Google Workspace so that training and simulation emails are delivered without being flagged as spam or showing warning banners. It covers three key steps: Add Box…

This guide explains how to configure Google Workspace so that training and simulation emails are delivered without being flagged as spam or showing warning banners. It covers three key steps:
- Add Boxphish IP addresses as Inbound Gateways to instruct Gmail to allow emails from our IPs to be accepted.
- Allow-list specific IP addresses to prevent them being marked as spam.
- Allow-list approved domains to prevent them being marked as spam.
Following these steps ensures emails arrive consistently in users’ inboxes.
Add Boxphish's IP addresses as Inbound Gateways
Google Workspace has tightened up its Inbound Gateway to prevent any messages it deems as a threat to be accepted. Previously this would simply display a banner on the email, however now they are rejected. Typically course emails will still be accepted, however phishing simulations will understandably be rejected unless Google is explicitly instructed to allow them through.
To assess your users' vulnerability to phishing, you will want to ensure that these emails are accepted when you run a simulated phishing campaign. Follow the instructions below to ensure this is the case.
- Log in to https://admin.google.com
- Navigate to Apps > Google Workspace > Gmail.
- Scroll down to the bottom of the Gmail settings page and click 'Spam, Phishing and Malware'.
- Scroll down to the section labelled 'Inbound Gateway' and enable the option.
- Add our Boxphish IP addresses to the Gateway IP list:
23.249.219.118
18.168.104.87
13.42.200.223
3.9.228.40
3.127.7.20
63.178.172.172
13.216.31.253
74.177.142.1 - Make sure that the following options are selected:
- 'Automatically detect external IP (recommended)' setting is checked
- 'Reject all mail, not from gateway IPs' setting is unchecked
- 'Require TLS for connections from the email gateways listed above' setting can be set as preferred
- Under 'Message Tagging', ensure 'Message is considered spam if the following header regexp matched' is checked.
- In the 'Regexp' field, enter text that is unlikely to be found in a simulated phishing email, for example: ksdhqloqwklcpsshovpsnlx.
- Check the 'Disable Gmail spam evaluation on mail from this gateway; only use header value' setting.
- Click 'save'.
Allow-list specific IP addresses
Adding IP addresses to the allow-list will help emails that get through the Inbound Gateway from falling into the spam folder - alongside adding domains this will prevent spam warning messages, or messages going to spam folders, that could otherwise tip your users off to their simulated phishing emails.
- Log in to https://admin.google.com with an admin account.
- Navigate to Apps > Google Workspace > Gmail.
- Scroll to the bottom and select 'Spam, Phishing and Malware.
- click 'Email allowlist'.
- In the 'Email allowlist' section, enter our Boxphish IP's:
23.249.219.118, 18.168.104.87, 13.42.200.223, 3.9.228.40, 3.127.7.20, 63.178.172.172, 13.216.31.253, 74.177.142.1
- Click 'Save'.
Please note: these changes can take time to apply. Please allow at least an hour for this to fully take effect.
Allow-list approved domains
Adding domains to the allow-list will help emails that get through the Inbound Gateway from falling into the spam folder - alongside adding IPs this will prevent spam warning messages, or messages going to spam folders, that could otherwise tip your users off to their simulated phishing emails.
- Log in to https://admin.google.com with an admin account.
- Navigate to Apps > Google Workspace > Gmail.
- Scroll to the bottom and select 'Spam, Phishing and Malware'.
- Scroll down to the 'Spam' section.
- Click 'Add rule' or 'Edit' if you wish to use an existing rule.
- Give the rule a name like "Boxphish Allow-list".
- Click 'Create' or if it is an existing rule, click 'edit'.
When you get to the Manage Address list page:
- Click 'Add Address list'.
- Click 'Bulk-Add Addresses' and populate using the information provided below.
Boxphish.com
box.boxphishmail.com
microsoft-notifications.co.uk
hr-staff-updates.com
bluuebeams.com
google-account-team.com
google-notifications.co.uk
noreply-deliveroocredit.co.uk
onedrivesharing.com
noreply-amazon.co.uk
dpdupdates.co.uk
electrosoftt.com
file-transf3rs.com
linkedin-network.com
insightfulsurveys.com
dropbox-notifications.co.uk
windowsmessages.com
e-cards-mail.com
noreply-linkedinverify.co.uk
microsoftaccountalert.com
royaal-maill.com
bankfraudteam.com
isecurity-alerts.com
amazoneorder.com
fa-uk.com
coffee-vouchers.com
who-travel-updates.com
365invoices.com
just-eat-voucher.co.uk
gmaillogin.co.uk
mail365-team.com
google-notificatons.com
netflix-password.co.uk
netlfix-update-details.com
netlixnotifications.co.uk
traffordgov.com
accessyourcloud.co.uk
microsoft-security-alerts.com
fileboxshare.com
noreply-ubercredit.co.uk
dhlshiping.com
theaccountsgroup.com
staff-payroll-updates.com
mydeliverytracker.com
freshworked.co.uk
webcontracttar.co.uk
noreply-hmrcupdate.co.uk
nhs-antibodytest.co.uk
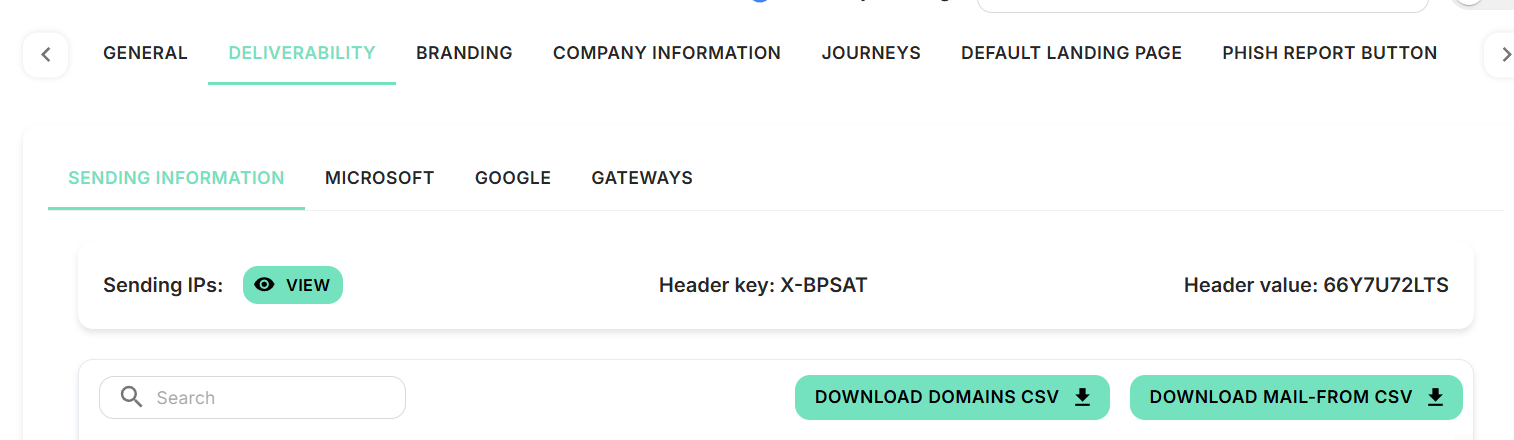
noreply-sage.com
This can also be found by selecting 'Settings' in the left menu, then the 'Deliverability' tab, and finally the 'Sending Information' tab:
Back on the settings page:
- Click 'Use Existing List'
- Select the new address list you created on the previous page
- Press 'Save'.
Your simulated phishing and security awareness training emails should now all be delivered successfully to your users, without warning banners popping up. We suggest you send a test simulated phishing email to your own address first to ensure all the settings have been applied correctly.
If you are having trouble applying these policies, please don’t hesitate to contact our support team at support@boxphish.com and we will be happy to help.

How did we do?